Monday 11 July 2011

Slow performance after you change the system time or resume the computer from sleep or hibernation on a System Center Configuration Manager 2007 SP2 client.

Q. SCCM Client is responding very Slow ?

Cause : This issue occurs because the System Center Configuration Manager 2007 SP2 client unnecessarily sends many WMI queries for the WM_TIMECHANGE message.

Solution :

1. You deploy many updates to a Microsoft System Center Configuration Manager 2007 Service Pack 2 (SP2) client.

2. You perform an operation that generates the WM_TIMECHANGE message from the client computer. For example, you perform one of the following operations:
- You change the system time.
- You resume a computer from sleep.
- You resume a computer from hibernation.
In this scenario, the computer runs slowly for some time. Additionally, the CPU usage is high, and the computer processes a heavy workload of disk I/O.

For all the details, including the cause and hotfix, see the following new Knowledge Base article:
KB2309968- Slow performance after you change the system time or resume the computer from sleep or hibernation on a System Center Configuration Manager 2007 SP2 client

Tips for Finding Objects in the Configuration Manager 2012 Console

Q. Configuration Manager 2012  enhancement ?

Solution :

1.   Introduction

In System Center Configuration Manager 2012, the Configuration Manager console has been greatly improved to enhance its usability. In addition to improvements in performance and layout, there are also a couple of new features to address the “how to find objects quickly” problem. This blog posts introduces the following useful features:
  • Organizational folders
  • Administrative categories
  • Search

2.   Organizational Folders

If you are familiar with Configuration Manager 2007, you know that organizational folders are not a new concept. They provide a similar experience to folders in the Windows file system, where they can be used to organize objects.
Typically, you can create a folder structure before you generate content, and then create or import content to be stored inside these folders. This makes it easier to organize content. There are many approaches you can use to set up a hierarchy of folders. For example, you can create folders that align with functional organizations, or folders by work flow, or whatever you like.
To create a folder, right-click the node or existing folder under which you want to place that folder, click Folder, and then click Create Folder - as shown in the following picture.


You can select multiple objects and move these to a folder at the same time. Select all the objects that you want to move, right-click an object, and then click Move - as shown in the following picture.
 

Note that any folder hierarchy that you have created is also shown when you use the Browse option to select objects in Wizards and dialog boxes, as shown in the next picture.


Benefits of using organizational folders:
  • Each folder  is shown separately in the Configuration Manager console
  • Folders can be hierarchically structured
  • Objects can be created within folders
  • Many objects can be moved to a folder at the same time
Limitations of using organizational folders include the following:
  • Objects can belong to one folder only
  • You cannot view objects in multiple folders at the same time. Instead, use search when you want to do this.
  • Organizational folders are not securable objects, so they are always visible and available to all administrative users.
  • Folders can be deleted only when they are empty
Object types that support organizational folders:
  • Deployments
  • Boot images
  • Configuration items
  • Configuration baselines
  • Driver packages
  • Drivers
  • Operating system images
  • Packages
  • Queries
  • Software metering rules
  • Software updates
  • Task sequences
  • User state migration data
  • Collections  (new in Configuration Manager 2012)
  • Applications (new in Configuration Manager 2012)

3.   Administrative Categories

Administrative categories provide an alternative solution to organizational folders.  Instead of using a hierarchical structure, administrative categories allow you to classify an object with tags of your choosing. Unlike organizational folders, you can keep all objects in one list view and sort them by category to make them easier to find.
You might also use administrative categories when an administrative user does not have security permissions to move objects into a particular organizational folder. In this scenario, the administrative user could add objects to an administrative category, which a higher-level administrative user can then use later to locate the objects.
You can assign an object to an administrative category by using a number of different methods:
You can assign the object when you create an object:

Or you can add and remove administrative categories to objects with a single click:


Benefits of using administrative categories:
  • Objects can be associated with multiple administrative categories
  • Administrative categories do not have to be associated with a hierarchical structure and they are easy to create
  • They can be viewed and searched in a list view
Limitations of using administrative categories:
  • There is no view for individual administrative categories; they must be used in conjunction with search or grouping
  • An administrative category can be deleted even if has objects associated with it
Objects that support administrative categories:
  • Configuration items
  • Configuration baselines
  • Drivers
  • Applications

4.   Search

In Configuration Manager 2012, search is completely redesigned to be more powerful: Similarly to how search works in Outlook 2012, you can now use free-text searches or criteria search, and set the search scope to the current node or folder, subfolders, or all objects.

4.1.            Free text search

This is the simplest form of search. Type in any keyword in the filter bar at the top of the list view. The result will be filtered to objects that have the keyword in any property. Note that the property column with the matched text might not be shown in the list view, but you can right-click any column header at the top of the list view to add this property column.  Also note, that if the default scope for the operation is set to “Current Node”, then objects from other nodes, or subfolders will not be searched.

4.2.            Criteria Searching

You can fine-tune searches by adding other known values as criteria for your search. When you click Add Criteria, new boxes are displayed for you to provide these values. Criteria for the same property are combined by “OR” logic, and criteria for different properties are combined by “AND” logic. For example, an application administrator can search for an application that is associated with the administrative categories “Productivity” or “Finance”, which have been deployed less than twice.

4.3.            Current node search and Subfolder search

By default, a search is scoped to the current node. Because folders have their own nodes in the Configuration Manager console, you can also scope a search on the current folder and all its subfolders. Both free text search and criteria search can use these scopes.

Use the Folder and all subfolder scope to search for all objects in a selected tree.

4.4.            Search All Objects

If you are looking for specific content but are not sure in which node to look, use a global search. Select All Objects on the Search ribbon tab to set the search scope to be global, and then enter free text in the search text box. This returns matches across all applicable object types and all properties.  The result list is interactive, and the workspace information is shown to help you find them in the console.

Benefits of using search:
  • Objects do not have to be in folders or categorized to be found
  • Search queries can be saved for reuse and sharing
  • Powerful tool for searching automatically generated content such as software updates
  • Can be both heuristic (free text search) or precise (criteria search)
  • Applies to all objects
Limitations of using search:
  • Because global search searches all object types, it might take longer to retrieve the result set.
  • Saved criteria in searches is available and visible to all administrative users, which might make data visible that you didn’t intend to be visible.

5.   Summary

This blog post compared three new features of the Configuration Manager console – organizational folders, administrative categories and search. Use the following table as a summary comparison.
Organizational FoldersAdministrative CategoriesSearches
Supported objects15 types4 typesAll types
Viewing experienceIndividual nodes, tree-like viewAn attribute of objectIn list view result
Replication through HierarchyYesYesYes except for saved global search
Relationship Object can belong to one folder onlyObjects  can be associated with multiple categoriesAny object that satisfies the criteria is shown in the results
Object organizationYou can create objects in the folder and you can move multiple objectsYou can create objects with associated categories and you can modify multiple categoriesSaved search automatically applies
SecurityFolders visible to all administrative users; objects and actions are secured by permissionsObjects and actions are secured by permissionsSaved criteria is visible to all administrative users; result objects are secured by permissions

When you use one or more of these features, you can more efficiently use the Configuration Manager console to manage your environment with Configuration Manager 2012.

Cheers!!!!!!!!!!!!

Sunday 10 July 2011

Inaccurate software metering reports are generated on a primary System Center Configuration Manager 2007 SP2 site server

Q. Inaccurate data returned for software meeting ?

Solution :

The software metering processor on a primary Microsoft Systems Center Configuration Manager 2007 Service Pack 2 (SP2) site server may return an invalid file size when it handles the software metering summarization data (.sum file) from a child site server.

The issue causes duplicate file entries in the SoftwareFile table. Additionally, one entry has an invalid file size (most likely 0). Inaccurate software metering reports are generated because of this issue.

This issue occurs because the software metering processor on the primary site server does not correctly handle the file size data from a child site server.

For all the details and a download link please see the following KB article:

KB2534671: Inaccurate software metering reports are generated on a primary System Center Configuration Manager 2007 SP2 site server 

Friday 8 July 2011

A step by step for using OSD through System Center Configuration Manager 2007.

Note: The following information and more can be found in the Operating System Deployment in Configuration Manager section of TechNet, it is just summarized here for your convenience.
For more information on creating offline or standalone USB based media see http://blogs.technet.com/b/configurationmgr/archive/2011/05/05/how-to-create-offline-or-standalone-usb-media-for-os-deployment-in-configmgr-2007.aspx

Preparing the Environment for Configuration Manager OSD

Step 1: Create a user account to be assigned as the Network Access Account:
Note: You can user an existing account or you can configure a new account.
1. On the Start menu, point to Administrative Tools, and then click Active Directory Users and Computers. The Active Directory Users and Computers window appears.
2. Create a new user named Network Access with a password and ensure that the password does not have to be changed at next logon.
3. Close Active Directory Users and Computers.
Note: This account is used by the client to access the Configuration Manager Distribution point when booted under WinPE so make sure the account has the necessary permission for this action.

Step 2: Create a Network Access Account:
1. If not already running, on the Start menu, click ConfigMgr Console. The Configuration Manager Console window appears.
2. In the tree pane, expand Site Database, expand Site Management, expand MCM, expand Site Settings, and then click Client Agents. The list of client agents appears in the results pane.
3. In the result pane, click Computer Client Agent, and then in the Actions pane, click Properties. The Computer Client Agent Properties dialog box appears displaying general properties.
4. After Network Access Account, click Set. The Windows User Account dialog box appears prompting for the account and password to configure as the Network Access Account. In the Name box, enter the Domain\NetworkAccessAccount you created in Step 1. In the Password and Confirm password boxes, type password and then click OK.
5. The Computer Client Agent Properties dialog box appears displaying properties for the Computer Client Agent. Click OK.


Step 3: Create the Configuration Manager package that OSD will use to install the Configuration Manager client after distributing the new operating system image:
1. In the tree pane, expand Site Database, expand Computer Management, expand Software Distribution, and then click Packages.
2. The list of packages for the site appears in the results pane. Notice that there are no packages created at this point.
3. In the Actions pane, click New, and then click Package From Definition. The Create Package from Definition Wizard dialog box appears. Click Next.
4. The Create Package from Definition Wizard Package Definition dialog box appears allowing you to select the package definition file to use. Notice the default package definitions built into Configuration Manager 2007 include the Configuration Manager Client Upgrade package definition.
5. Under Package definition, click Configuration Manager Client Upgrade, and then click Next. The Create Package from Definition Wizard Source Files dialog box appears prompting for source file handling instructions.
6. Click Always obtain files from a source directory, and then click Next. The Create Package from Definition Wizard Source Directory dialog box appears allowing the designation of the source file directory.
7. Click Local drive on the site server, and then click Browse. The Browse For Folder dialog box appears.
8. Click C:\Program Files\Microsoft Configuration Manager\Client, and then click OK. The Create Package from Definition Wizard Source Directory dialog box displays the configured source directory. Click Next.
9. The Create Package from Definition Wizard Summary dialog box appears indicating the wizard is ready to create the package. Click Finish.
10. In the tree pane, expand Packages, expand Microsoft Configuration Manager Client Upgrade, and then click Programs. The programs for the package appear in the results pane. Notice that there is only one program for this package, that being a silent upgrade.
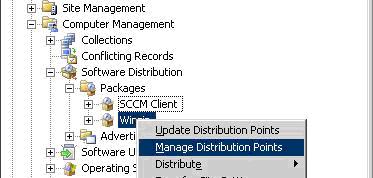
11. In the tree pane, click Distribution Points. The distribution points for this package appear in the results pane. Notice that there are no distribution points assigned to this package yet.
12. In the Actions pane, click New Distribution Points. The New Distribution Points Wizard window appears. Click Next.
13. The New Distribution Points Wizard Copy Package dialog box appears displaying the list of distribution points for the package. Under Distribution points, click the DP you want to use and then click Next.
14. The New Distribution Points Wizard Wizard Completed dialog box appears indicating that the wizard was successfully completed. Click Close.
Ref: http://technet.microsoft.com/en-us/library/bb632401.aspx

Step 4: Distribute the boot package:
1. In the tree pane, expand Site Database, expand Computer Management, expand Operating System Deployment, and then click Boot Images. The boot images for the site appear in the results pane. Notice that there are two boot images for x64 and x86 platforms.
2. In the tree pane, expand Boot Images, expand Boot image (x86), and then click Distribution Points. The distribution points for this package appear in the results pane. Notice that there are no distribution points assigned to this boot image yet.
3. In the Actions pane, click New Distribution Points. The New Distribution Points Wizard window appears. Click Next.
4. The New Distribution Points Wizard Copy Package dialog box appears displaying the list of available distribution points for the boot image.
5. Under Distribution points, click the DP you want to use and click Next.
6. The New Distribution Points Wizard Wizard Completed dialog box appears indicating that the wizard has completed successfully. Click Close.

Installing a Configuration Manager PXE Service Point
We need to create PXE service point in the Configuration Manager site. A PXE service point must be installed on a Windows Deployment Server (WDS). To install WDS please follow the steps below. You can have this role running on the same server or you can install it on another server and make that a site server.
Step 1: Install WDS service (For windows 2003 SP2 and later):
1. Got to Add/Remove Programs select Windows Components
2. Select Windows Deployment services and install.
For more information please click on the link http://technet.microsoft.com/en-us/library/cc766320.aspx#BKMK_InstallingWDS .
Note: Make sure that you don’t configure anything right now, just do the install. You also need to grant the site server computer administrative rights to the member server where you are installing the WDS services.


Step 2: Install a remote PXE service point:
1. In the tree pane, expand Site Database, expand Site Management, expand MCM, expand Site Settings, and then click Site Systems. If you are using different server as a PXE then in the tree pane, click Site Systems, and then in the Actions pane click New.
2. A new menu appears. Click Server. The New Site System Server Wizard General dialog box appears. In the Name box, type the member server where WDS is deployed.
3. In the Intranet FQDN box, type FQDN of the server Click Next.
4. The New Site System Server Wizard System Role Selection dialog box appears displaying the list of site system roles that can be assigned to this computer. Under Available roles, select PXE service point, and then click next.
5. A PXE Service Point Configuration message box appears indicating that specific ports will be opened up on this site system to support PXE requests. Click Yes to allow the ports to be opened on the computer.
6. The New Site System Server Wizard PXE - General dialog box appears allowing you to configure the PXE service point. Notice that the default configuration is to allow incoming PXE requests on all network adapters and to require the user to supply a password to initiate installation through the PXE service point.
7. Click to clear Require a password for computers that boot to PXE, and then click Next.
8. The New Site System Server Wizard PXE - Database dialog box appears allowing you to configure access to the database and for the required certificate configuration. Notice that the default configuration is to use the computer account to access the Configuration Manager site database to validate client identity, and to create a self-signed certificate that is valid for one year.
9. Click Next to accept the default configuration. The New Site System Server Wizard Summary dialog box appears indicating that the wizard is ready to create the new site system. Click Next.
10. The New Site System Server Wizard Wizard Completed dialog box appears indicating that the wizard was completed successfully. Click Close.
ref: http://technet.microsoft.com/en-us/library/bb680668.aspx

Step 3: Distribute the boot package to the PXE service point:
1. In the tree pane, expand Site Database, expand Computer Management, expand Operating System Deployment, and then click Boot Images. The list of boot images in the site appears in the results pane. Notice that there are two boot images for various platforms.
2. In the tree pane, expand Boot Images, expand Boot image (x86), and then click Distribution Points.
3. The distribution points for this package appear in the results pane. Notice that the boot has already been distributed to the distribution point (which is running on the site server). You also need to distribute it to the PXE service point.
4. In the Actions pane, click New Distribution Points. The New Distribution Points Wizard window appears. Click Next.
5. The New Distribution Points Wizard Copy Package dialog box appears displaying the list of available distribution points for the boot image. Under Distribution points, click Member\<SERVER>PXEImages$, and then click Next.
6. The New Distribution Points Wizard Wizard Completed dialog box appears indicating that the wizard has completed successfully. 6. Click Close.
ref: http://technet.microsoft.com/en-us/library/bb694069.aspx

Preparing the Operating System Image for Deployment
Step 1: Capturing an image from a Reference Computer Manually:
  1. Build the reference computer. The reference computer must meet the following requirements:
    1. The computer must be a member of a workgroup.
    2. The local Administrator password must be blank.
    3. Do not require password complexity in the local system policy.
  2. In the Configuration Manager console, navigate to System Center Configuration Manager / Site Database / Computer Management / Operating System Deployment / Task Sequences. Right-click Task Sequences and then click Create Task Sequence Media. The Create Task Sequence Media wizard will open. Select Capture Media. For more information, see Task Sequence Media Wizard.
  3. On the Media Type page specify the type of media you want to use for the capture media. You can specify a USB flash drive, CD, or DVD as the media type. If you specify a USB flash drive make sure the device is connected to the computer so that the necessary files can be written directly to the device.
  4. Specify the Media file by first clicking the Browse button and browsing to the location where the media file will be created, and then type the name of the media file that will be created. For CD and DVD media, the capture media .ISO file that is created will be written to the location specified. The .iso image will be copied to the media later. USB files can be written directly to the USB device.
  5. Select the boot image that should be associated with the media. Click the Browse button to specify the computer architecture to be targeted with the captured image in the Select a Boot Image dialog box. Boot images must be available on one or more distribution points. For more information on distributing boot images, see Manage Distribution Points (Operating System Deployment). To specify the distribution point that contains the specified boot image, use the drop down list of available distribution points. Click OK.
Note: The boot image selected must be of an architecture that will run on the reference computer hardware.
  1. For CD and DVD media, use an appropriate software application to create a bootable CD or bootable DVD containing the .ISO file.
  2. Boot the computer into the full operating system and insert the capture media (CD, DVD or USB flash drive).
Note: For all supported operating systems except Windows Vista and Windows Server® 2008, the sysprep folder ( %SystemDrive%\Sysprep ) must be present on the computer before you launch the capture CD.
  1. Run the Image Capture Wizard and identify the location for the captured image to be stored.
ref: http://technet.microsoft.com/en-us/library/bb693629.aspx

Step 2: Create the image package:
1. In the tree pane, expand Site Database, expand Computer Management, expand Operating System Deployment, and then click Operating System Images. The operating system images for the site appear in the results pane. Notice that there are no images yet. You need to create an operating system image from an image file previously created.
2. In the Actions pane, click Add Operating System Image. The Add Operating System Image Wizard Data Source dialog box appears allowing you to specify the image file to use.
3. In the Path box, type \\<Servername>\Images\Vista.wim and then click Next.
4. In the Name box, type Windows Vista. In the Version box, type 1.0. In the Comment box, type Windows Vista image and then click Next.
5. The Add Operating System Image Wizard Summary dialog box appears indicating that the operating system image is ready to be created. Click Next.
6. The Add Operating System Image Wizard Wizard Completed dialog box appears indicating that the wizard completed successfully. Click Close.

Step 3: Add the image to a distribution point:
1. In the tree pane, expand Site Database, expand Computer Management, Operating System Deployment, expand Operating System Images, and then expand Windows Vista. The Windows Vista image items appear in the tree pane.
2. In the tree pane, click Distribution Points, and then in the Actions pane, click New Distribution Points. The New Distribution Points Wizard window appears. Click Next.
3. The New Distribution Points Wizard Copy Package dialog box appears displaying the list of available distribution points for the OS image. Under Distribution points, click the DP that you want to use and then click Next.
Note: You do not need to distribute the operating system image to the PXE service point. The client will retrieve the image from the distribution point.
4. The New Distribution Points Wizard Wizard Completed dialog box appears indicating that the wizard has completed successfully. Click Close.
Note: This will take a little bit of time to complete.


Preparing for Bare Metal OS Deployment
You now need to prepare the site for a bare metal client deployment through PXE boot. You will begin by creating a collection that you can then advertise the operating system image installation task sequence to. You will then add the bare metal client to this collection.

Step 1: Create a bare metal system collection:
1. In the tree pane, expand Site Database, expand Computer Management, and then click Collections. The collections in the site appear in the results pane. In the Actions pane, click New Collection.
2. The New Collection Wizard General dialog box appears allowing you to name the collection. In the Name box, type Bare Metal Systems and then click Next.
3. The New Collection Wizard Membership Rules dialog box appears allowing you to add membership rules for the collection. You will manually add the client to the collection when you create the client later in this exercise, so no membership rule is needed for our lab.
4. Click Next to not add any membership rules. A Bare Metal Systems Collection message box appears indicating that there will not be any members of the collection until a membership rule is added. Click OK.
5. The New Collection Wizard Advertisements dialog box appears displaying the advertisements targeted to this collection. Notice that currently there are no programs advertised to this collection. Later in this lab you will advertise a task sequence to the collection. Click Next.
6. The New Collection Wizard Security dialog box appears allowing you to configure security rights for the collection. Click Next to use the default security rights.
7. The collection is created. When complete, the New Collection Wizard Confirmation dialog box appears indicating that the collection was created successfully. Click Close.
8. The collections in the site appear in the results pane. Notice that the Bare Metal Systems collection now appears. You will add a manual record for the bare metal client to this collection in an upcoming procedure.


Step 2: Create a bare metal client record:
1. In the tree pane, expand Site Database, expand Computer Management, expand Operating System Deployment, and then click Computer Association. The computer associations for the site appear in the results pane. Notice that by default there are no computer associations.
2. In the Actions pane, click Import Computer Information. The Import Computer Information Wizard Select Source dialog box appears prompting to import systems from a file or to import a single computer.
3. Click Import single computer, and then click Next. The Import Computer Information Wizard Single Computer dialog box appears allowing you to configure properties to identify the computer being added. Notice that you must add a computer name and a MAC address or SMBIOS GUID.
4. In the Computer Name box, type Bare_Metal .The Computer Name supplied is only for display in the collection. It does not have to be what the client will be named when it is installed.
5. In the MAC address box, type the MAC address. Notice that after supplying a MAC address, the requirement for a SMBIOS GUID is no longer valid. You only have to supply one or the other, not both. Click Next.
6. The Import Computer Information Wizard Data Preview dialog box appears displaying the properties of the bare metal system to be added. Click Next.
7. The Import Computer Information Wizard Choose Target Collection dialog box appears allowing you to designate the target collection for the new system. Click Add computers to the following collection, and then click Browse.
8. The Browse Collection dialog box appears displaying all the collections in the site. Under Collections, click Bare Metal Systems, and then click OK.
9. The Import Computer Information Wizard Choose Target Collection dialog box appears displaying the designated collection to add the bare metal system to. Click Next.
10. The Import Computer Information Wizard Summary dialog box appears indicating the wizard is ready to import the single computer. Click Next.
11. The Import Computer Information Wizard Wizard Completed dialog box appears indicating that the wizard completed successfully. Click Close.
Note: The computer associations for the site appear in the results pane. Notice that the new computer does not appear. This is because there is no association with an existing system for a user state migration. The new computer was created however.
12. In the tree pane, expand Site Database, expand Computer Management, expand Collections, and then click Bare Metal Systems. The members of the Bare Metal Systems collection appear in the results pane. Notice that Bare Metal appears as a member of the collection.


Deploying an OS Image Using Configuration Manager 2007
Step 1: Create an image deployment task sequence:
1. In the tree pane, expand Site Database, expand Computer Management, expand Operating System Deployment, and then click Task Sequences. The task sequences for the site appear in the results pane. Notice that there are no task sequences yet. You need to create a task sequence that will allow you to deploy an operating system image.
2. In the Actions pane, click New, and then click Task Sequence. The New Task Sequence Wizard Create a New Task Sequence window appears prompting for the type of task sequence to create: to deploy an image package, build a reference system or a custom task sequence.
3. Click Next to create a task sequence that will install an existing image package. The New Task Sequence Wizard Task Sequence Information dialog box appears prompting for the name and description for the task sequence, as well as which boot image to use.
4. In the Task sequence name box, type Install Vista for PXE in the Comment box, type Installs Windows Vista image in a PXE deployment and then click Browse. The Select a Boot Image dialog box appears displaying the boot images available.
5. Click Boot image (x86) and then click OK. The New Task Sequence Wizard Task Sequence Information dialog box appears displaying the name and description of the task sequence, as well as the boot image to use. Click Next.
6. The New Task Sequence Wizard Install the Windows Operating System dialog box appears prompting for the image package, licensing, and administrator password to use. Click Browse.
7. The Select an Operating System Image dialog box appears displaying the image packages available. Click Windows Vista 1.0 en-US and then click OK.
8. The New Task Sequence Wizard Install the Windows Operating System dialog box appears displaying the image package to use. Notice that the default action is to install all images in the package. Also notice that the default configuration is to partition and format the target computer’s hard disk. That likely is required in a bare metal scenario, which we are performing.
9. Click Next to not designate a product key, not specify a licensing mode, and to disable the local administrator account on the target system. The New Task Sequence Wizard Configure the Network dialog box appears prompting whether the target system will join a workgroup or domain.
10. Click Join a domain, and then after Domain, click Browse. The Select a Domain dialog box appears displaying the available domains. Under Domains, click Domain name and then click OK.
11. The New Task Sequence Wizard Configure the Network dialog box appears displaying the domain the target client should join after installation of the Vista image. Notice that you can also configure a specific OU for the client to join. Click Set.
12. The Windows User Account dialog box appears prompting for the account and password to use to join the new computer to the domain. In the Name box, enter the account that has rights in the domain to add systems to the domain.
13. In the Password and Confirm password boxes, type the password and then click OK. The New Task Sequence Wizard Configure the Network dialog box appears displaying the domain the target client should join after installation of the Vista image as well as the account that will be used to add the client to the domain. Click Next.
14. The New Task Sequence Wizard Install the ConfigMgr client dialog box appears prompting for the package to use for the Configuration Manager client installation, which occurs after the OS image has been deployed. Click Browse. The Select a Package dialog box appears displaying the packages available.
15. Click Microsoft Configuration Manager Client Upgrade 4.0 All and then click OK. The New Task Sequence Wizard Install the ConfigMgr client dialog box appears displaying the package and program to use for the Configuration Manager client installation. Notice that the installation properties include the FSP parameter to allow the new client deployment to report deployment state messages. Click Next.
16. The New Task Sequence Wizard Configure State Migration dialog box appears prompting for configuration of the user state capture process. Since we are deploying through PXE, there is no user or computer state to capture in our scenario. Click to clear Capture user settings. Click to clear Capture network settings. Click to clear Capture Microsoft Windows settings, then click Next.
17. The New Task Sequence Wizard Include Updates in Image dialog box appears prompting for deployment of software updates. Notice that the default configuration is to not deploy software updates with the image.
18. Click Next to not deploy any software updates for our lab. The New Task Sequence Wizard Install Software Packages dialog box appears prompting for deployment of software packages after the image has been installed. This is where you’d configure to add in additional Configuration Manager packages, such as Microsoft Office 2007.
19. Click Next to not deploy any software packages in the lab environment. The New Task Sequence Wizard Summary dialog box appears indicating the wizard has been completed and is ready to create the task sequence. Click Next.
20. The task sequence is created, and then the New Task Sequence Wizard Wizard Completed dialog box appears indicating that the task sequence was successfully created. Click Close.
21. The task sequences for the site appear in the results pane. Notice that there is now one task sequence in the site.


Step 2: Modify the task sequence:
1. In the results pane, click Install Vista for PXE, and then in the Actions pane, click Edit. The Install Vista for PXE Task Sequence Editor dialog box appears displaying the task sequence steps.
2. In the left pane, click Partition Disk. The Partition Disk action properties are displayed in the right pane. Under Volume, click (Primary), and then click Properties (the icon resembles a piece of paper). The Partition Properties dialog box appears displaying the default configuration of the partition action. Notice that the default action is to not perform a quick format.
3. Click Quick format, and then click OK. The Install Vista for PXE Task Sequence Editor dialog box appears displaying the task sequence steps. Click OK.
4. The task sequences for the site appear in the results pane. Notice that there is only one task sequence in the site.


Step 3: Advertise the task sequence:
1. In the results pane, click Install Vista for PXE. The task sequence properties appear at the bottom of the results pane. Click the References tab.
2. The list of packages used by this task sequence appears in the results pane. Notice that there are three packages used by this task sequence. Start Windows Explorer and verify that each of the three packages is available on the distribution point. Do not proceed until the three packages are available on the distribution point.
3. In the Actions pane of the Configuration Manager Console under Install Vista for PXE, click Advertise. The New Advertisement Wizard General dialog box appears prompting for general properties of the advertisement. Notice that the name defaults to the task sequence name.
4. After Collection, click Browse. The Browse Collection dialog box appears. Click Bare Metal Systems, and then click OK.
5. The New Advertisement Wizard General dialog box appears prompting for general properties of the advertisement. To make this task sequence available through PXE, you must configure that option.
6. Click Make this task sequence available to boot media and PXE, and then click Next. The New Advertisement Wizard Schedule dialog box appears prompting for the advertisement schedule. To make the PXE boot scenario unattended, you need to create an assignment for the task sequence.
7. If you do not make the advertisement an assignment, the task sequence will not execute automatically and you’ll be required to select the task sequence on the bare metal system – thus no longer an unattended deployment.
8. Click New (the toolbar icon resembles a starburst). The Assignment Schedule dialog box appears.
9. Click OK to create a schedule for the current date and time. The New Advertisement Wizard Schedule dialog box appears displaying the advertisement schedule. Click Next.
10. The New Advertisement Wizard Distribution Points dialog box appears prompting for how the task sequence will access any content that is required. Click Next to allow content to be downloaded when needed by the task sequence, to not allow access to remote distribution points, and require the use of protected distribution points if available. The New Advertisement Wizard Interaction dialog box appears prompting for how the user will interact with the task sequence.
11. Click Next to not allow the user to run the program as an optional program prior to the mandatory schedule and to display progress of the task sequence. The New Advertisement Wizard Security dialog box appears prompting for security rights for the task sequence.
12. Click Next to use the default security rights. The New Advertisement Wizard Summary dialog box appears indicating the wizard has been completed successfully and is ready to create the advertisement. Click Next.
13. The advertisement is created, and then the New Advertisement Wizard Wizard Completed dialog box appears indicating the advertisement was successfully created.
14. Verify that all processes were completed successfully, and then click Close. The task sequences for the site appear in the results pane. Notice that there is one task sequence in the site. Your site is now ready to deploy a new operating system image through a network boot scenario.
ref: http://technet.microsoft.com/en-us/library/bb632559.aspx


Installing the Image at the Target Client Computer
Step 1: Install the operating system image
1. Start the Bare Metal Client Machine.
2. The image startup is resumed. The boot image should get an IP address from the DHCP server (which is running on the site server) and then get the advertised task sequence from the management point (which is running on the site server). This will include retrieving the boot image from the WDS server (which is running on the PXE service point).
3. An Installation Progress message box appears as the Windows Vista operating system image is installed on the bare metal client computer.
4. It will take a number of minutes for the Windows Vista image to be deployed to the computer (typically around 60 minutes or so). It will automatically restart in the middle of this process. Notice that Windows PE is started and initialized to install the image. After the system reboots into Window PE, the Installation Properties message box appears displaying the progress bar for installing the image.
Eventually your image will be installed and you’ll be well on your way to rolling out images throughout your company with just a few clicks of the button.
References:
Operating System Deployment in Configuration Manager

Deletion of Orphaned Distribution Points

 Q. The servers hosting the DP shares were decommissioned without us knowing. Once we found out, we deleted the DPs from all associated Packages and then deleted them from Site Systems on their appropriate Primary Site. However, because the servers were no longer around, things weren't totally cleaned up. Every day I would see entries in my Central Primary Site server's distmgr.log where SMS was not able to delete specific packages from these orphaned DPs.

Solutions :

Delete action for previously deleted package server '["Display=\\servername01\sms2003dp\"]MSWNET:["SMS_SITE=ABC"]\\servername01\sms2003dp\' for package 'ABC00002' will be ignored.
Delete action for previously deleted package server '["Display=\\servername02\sms2003dp\"]MSWNET:["SMS_SITE=ABC"]\\servername02\sms2003dp\' for package 'ABC00002' will be ignored.
 Using SQL Server Management Studio, the Microsoft technician and I used the following queries to find if the DPs were still in our databases:
SELECT * FROM PkgServers WHERE NALPath like '%servername01%'
SELECT * FROM PkgStatus WHERE PkgServer like '%servername01%'
Once we confirmed these queries returned entries for the orphaned DPs (and ONLY the orphaned DPs) we checked to make sure we had a valid SMS backup. Once that was confirmed, we ran a delete query to clean things up:
DELETE FROM PkgServers WHERE NALPath like '%servername01%'
DELETE FROM PkgStatus WHERE PkgServer like '%servername01%'
And like that, I no longer have activity from non-existant DPs.


Cheers!!!!!!!!!!

Cant Copy Boot image to server share

Q.  Problem with my image pxe dist' ,one of my workers re installed pxe service role in order to fix it ..but he also deleted the boot images in order to coplete the delete proccess of the pxe role..
but now i try to copy the boot images (86+64) to the \\smspxeservershare$ it show that is was successfully added buty when i look i dont see it..
i went to the query error messages and saw an error :
SMS Distribution Manager failed to process package "Boot image (x86)" (package ID = IL000001).
Possible cause: Distribution manager does not have access to either the package source directory or the distribution point.
Solution: Verify that distribution manager can access the package source directory/distribution point.
Possible cause: The package source directory contains files with long file names and the total length of the path exceeds the maximum length supported by the operating system.
Solution: Reduce the number of folders defined for the package, shorten the filename, or consider bundling the files using a compression utility.
Possible cause: There is not enough disk space available on the site server computer or the distribution point.
Solution: Verify that there is enough free disk space available on the site server computer and on the distribution point.
Possible cause: The package source directory contains files that might be in use by an active process.
Solution: Close any processes that maybe using files in the source directory.  If this failure persists, create an alternate copy of the source directory and update the package source to point to it.

Final Solution :

Go to computer client agent properties  > BITS Tab  > and check mark Not Configured Option and after few hours it started working fine :)

Cheers!!!!!!!!!

Configuration Manager 2007 Client Status Reporting Stoped.

Q. I installed the Configuration Manager 2007 Client Status Reporting (CSR) on my central site server but when i started the service via CSR console i get in UIconfig.log the message below :
Failed to start the service due to "The dependency service does not exist or has been marked for deletion"
My set up is  SCCM R3 SP2 ,Windows 2008 R2 . In info tab i get this :

The ConfigMgr Client Status Reporting Service is stopped. This service needs to be running in order to perform monitoring operations.

Possible reasons:
1. The service is not installed properly.  If the service is not installed, initiate a repair from the Add Remove Programs control panel applet.
2. The service credentials are invalid. Enter valid credentials for the service in the "Site Settings" tab and click the "Apply" or "OK" button to start the service.
3. The service cannot start using the specified credentials. Ensure that the Client Status Reporting Service has local administrative rights and has the "Log on as a service" local security setting rights.


Final Solution :

I made a bad configuration on SQL instance ! due to which it was not working  So I solve the problem and it started working

Cheers!!!!!!!

Management Point Installation Failure + Missing MP Log Files

Q. I have tried to install the MP on these sites via Site Management -> [Site] -> Site Settings -> Site Systems -> [Site Server] -> New Roles; this wizard runs through without errors, but once its complete nothing more happens. No MP appears on that site, and no entry for SMS_MP_CONTROL_MANAGER appears under 'Site Status' for the secondary site also unable to install the manully on secondary server.

Solution :

The problem was being caused by an incorrect sender address from the primary site to these secondary sites; (caused by setting up secondary sites in these locations in the past, but installing SCCM on a different server).
So it seems that if youre having problems with installing a management point on a secondary site, and the symptoms include missing mp log files, and missing entries for the management point under Site Status, it's worth checking that your sender addresses are correct.
Site Management > [Primary Site] > Site Settings > Addresses > Right-click the address > properties
in my case the Site server name was set to the wrong server, so to fix i deleted this address and created a new one. once the new address was in place, i was able to add the management point site role and it installed correctly.

Cheers!!!!!!!!

Tuesday 5 July 2011

ConfigMgr Collection Creator | Makecoll.exe | SMS/SCCM Collection Creation Script

ConfigMgr Collection Crerator 1.0 (Makecoll.exe) can be used to create a new collection from a list of NeBIOS computer names.


ConfigMgr Collection Crerator 1.0 can be downloaded from http://smstools.codeplex.com

How to use Preload Package Tool for Configuration Manager 2007 to load package on SCCM Site

The Preload Package Tool (PreloadPkgOnSite.exe) is used to manually install compressed copies of software distribution package source files on Configuration Manager 2007 sites. After package source files are installed, a status message is sent up the site hierarchy indicating the presence of the new package source files. This avoids sites higher in the hierarchy from copying package source files over the network when distribution points at child site are selected to host software distribution package content that has already been preloaded on them.

  • Copy .PCK files from a backup location to the distribution point share (Ex c:\smspkg) on the site manually. After manually copying the files, ensure that the read-only NTFS file attribute for the .PCK file is set.
  • Copy PreloadPkgOnSite.exe file to the distribution point share directory (c:\smspkg) on the child site that you wish to preload compressed software distribution package source (.PCK) files.
  • From a command prompt, run the tool using the following syntax:
    PreloadPkgOnSite.exe [PkgID]
    This command need to be run for each PCK files that need to be loaded on the secondary site.
Running this command will update necessary software distribution package source location information for the site and forward this information up the hierarchy.
  • Open the System Center Configuration Manager
  • Drill down and choose the central site from where the packages need to be distributed
  • Choose:
         Systems Center Configuration Manager
                 ->Site Database (site code - site name)
                           ->Computer Management
                                     -> Software Distribution
                                             -> Packages
  • Select the package that needs to be distributed to the site.

         Right click on the package.

         Select Manage Distribution Points
  • In the Welcome screen

           Click Next


  • In the Select Destination Distribution Point
Select Copy the package to new distribution points
  • Click Next
  • In the Package page
         Select the SCCM Site where you need to distribute the package.
         Click Next
         In the Completion Page
         Click Next
  • In the Confirmation Page
            Click Close
  • Repeat these Step for each package that need to be distributed to the SCCM Site.
  • Review the distmgr.log on SCCM sites to ensure that all the package are successfully distributed to the SCCM site.

SCCM WSUS Synchronization failed

Error in wsyncmgr.log:

Sync failed: LocalDBOtherError: SqlException: Timeout expired. The timeout period elapsed prior to completion of the operation or the server is not responding.~~at Microsoft.UpdateServices.DatabaseAccess.DBConnection.DrainObsoleteConnections(SqlException e). Source: Microsoft.SystemsManagementServer.SoftwareUpdatesManagement.WSyncAction.WSyncAction.SyncWSUS
 

Resolution:
Clean the WSUS and maintain WSUS.
 
Here are two methods that should be used to maintain a WSUS hierarchy:
Re-index the WSUS 3.0 Database

http://gallery.technet.microsoft.com/ScriptCenter/en-us/6f8cde49-5c52-4abd-9820-f1d270ddea61

Run the Re-Index monthly. This can be run in any order within the hierarchy since it simply improves performance of WSUS database.
 NOTE: In addition to the steps covered in the link above, the following changes may be required:
  • If you are hosting the WSUS database (SUSDB) on a full SQL server instead of using Windows Internal Database (WIDS), you can simply run the re-index as a SQL query using SQL Management Studio
  • On a Windows Server 2008 R2 server, you have to update the recommended command line to the following to get the script to work with WIDS:
sqlcmd -i WSUSDB.sql -S \\.\pipe\MSSQL$MICROSOFT##SSEE\sql\query -E -I

You also have to install the SQL Native Client and the SQLCMD utility from http://www.microsoft.com/downloads/details.aspx?familyid=d09c1d60-a13c-4479-9b91-9e8b9d835cdc&displaylang=en
Run the WSUS Server Clean-Up Wizard
  • You MUST run the WSUS Server Clean-up Wizard from the bottom of the WSUS hierarchy to the top and NEVER from the top down.
  • You should run the WSUS Server Clean-Up Wizard throughout the hierarchy on a monthly basis. To help with this effort, you may want to automate the wizard using any of the following:
  • PowerShell script sample for accessing the WSUS API for the cleanup functions: http://gallery.technet.microsoft.com/ScriptCenter/en-us/fd39c7d4-05bb-4c2d-8a99-f92ca8d08218
  • Sample tool that handles the WSUS Cleanup wizard functions and offers a method to call the WSUSDBMaintenance script which can be useful if you run it as a scheduled task from the bottom of the hierarchy to the top on a monthly basis: http://wsus.codeplex.com/releases/view/17612
How to Run WSUS Cleanup Wizard:
 To run the Server Cleanup Wizard

In the WSUS administration console, select Options, and then Server Cleanup Wizard.
  1. By default this wizard will remove unneeded content and computers that have not contacted the server for 30 days or more. Select all possible options, and then click Next.
  2. The wizard will begin the cleanup process, and will present a summary of its work when it is finished. Click Finish to complete the process.


Determine which NTFS drive should have distribution point

First time when you distribute the package to distribution point then SMS/SCCM chooses the NTFS drive which has maximum free space.If you have 2 to 3 NTFS drives and you want to chosse one of them. There is no provision given at SMS/SCCM server side to prevent SMS/SCCM from using a NTFS dirve with maximum free space. Also, if any drive that is currently being used for distribution point is full, then SMS/SCCM starts using the next available drive with maximum.

Method 1:

Create the blank text file on the other drives with the name NO_SMS_ON_DRIVE.SMS which will prevent respective NTFS drive from creating SMSPKGC$ (Here C represents the drive) folder.This file named NO_SMS_ON_DRIVE.SMS needs to be placed at the root of the drive you want excluded.Drive which dont has NO_SMS_ON_DRIVE.SMS file,will have SMSPKGC$ folder.
 
Method 2:

Insted of installing a standard distribution point,install a distribution point on a server share.

1) Create a folder called smspkgx$ on the partition you want it and share that folder. (x is the drive letter of your choice).

2) Create the distribution point on a share basis in the sms admin console instead of on a server name. (Share has to exist). Just right-click site systems inside the sms admin console, select new, server share, ...)


Microsoft Article: http://support.microsoft.com/kb/871234

How to verify Management Point is working fine in SCCM 2007

Verify Management Point Installation Logs
1. Verify MPsetup.log. Make sure MP is install successfully, if not resolve the problem. If you find any problem in MPSetup.log, then verify MPMSI.log for more information on the issue.

MPSetup.log:
<12-16-2008 17:12:09> Installing the SMSMP
<12-16-2008 17:12:09> Passed OS version check.
<12-16-2008 17:12:09> IIS Service is installed.
<12-16-2008 17:12:09> SMSMP already installed (Product Code: {3945C886-9779-4280-B537-AB8E62A0878E}). Upgrading/Reinstalling SMSMP
<12-16-2008 17:12:09> New SMSMP is a new product code {{7AF53388-F428-4A8B-8F20-DBB4851E3424}}. This is a major upgrade.
<12-16-2008 17:12:09> Enabling MSI logging. mp.msi will log to D:\SMS\logs\mpMSI.log
<12-16-2008 17:12:09> Installing D:\SMS\bin\i386\mp.msi REINSTALLMODE=vmaus CCMINSTALLDIR=”D:\SMS_CCM” CCMSERVERDATAROOT=”D:\SMS” USESMSPORTS=TRUE SMSPORTS=80 USESMSSSLPORTS=TRUE SMSSSLPORTS=443 USESMSSSL=TRUE SMSSSLSTATE=0 CCMENABLELOGGING=TRUE CCMLOGLEVEL=1 CCMLOGMAXSIZE=1000000 CCMLOGMAXHISTORY=1
<12-16-2008 17:15:59> mp.msi exited with return code: 0
<12-16-2008 17:15:59> Verifying CCM_CLIENT virtual directory.
<12-16-2008 17:15:59> Website path is IIS://LocalHost/W3SVC/1.
<12-16-2008 17:15:59> Connecting to IIS.
<12-16-2008 17:15:59> CCM_CLIENT is currently D:\SMS\Client
<12-16-2008 17:15:59> Installation was successful.
2. Check IIS and make sure that you have virtual directory named SMS_MP under default website.
3.Check mpcontrol.log and find if you have below sucesses status message (Status Code 200). ( I use tracert32 to read log files)
Call to httpsendrequestsync succeeded for port 80 with status code 200,text ok
http test request succeeded

successfully performed Management Point avaialbility check against local computer

4. Fianlly for testing run this on IE from any client and from the server itself and you sould get the results mentioned.

  a) Run http://<MP Name>/sms_mp/.sms_aut?mplist

   This returns a list of MP's installed on this site including the secondary site MP's.

  b) Run http://<MP Name>/sms_mp/.sms_aut?mpcert

   This returns a long list of numbers and letters.

Output of Step a
- <MPList>
- <MP Name="smsserver1" FQDN="smsserver1.example.abc.com">
<Version>6487</Version>
<Capabilities SchemaVersion="1.0" />
</MP>
- <MP Name="smsserver18" FQDN="smsserver18.example.abc.com">
<Version>6487</Version>
<Capabilities SchemaVersion="1.0" />
</MP>
- <MP Name="smsserver2" FQDN="smsserver2.example.abc.com">
<Version>6487</Version>
<Capabilities SchemaVersion="1.0" />
</MP>
- <MP Name="secondary1" FQDN="secondary1.example.abc.com">
<Version>6487</Version>
<Capabilities SchemaVersion="1.0" />
</MP>
</MPList>
More Info on MP and resolving issues:

http://technet.microsoft.com/en-us/library/cc180197.aspx
http://technet.microsoft.com/en-us/library/cc180195.aspx 

System Center Configuration Manager 2007 backups fail with Win32 Error = 145

Microsoft System Center Configuration Manager 2007 backups may fail if other VSS-aware backup software is scheduled to run concurrently. In this scenario, the Smsbkup.log will show entries similar to the following:
Deleting E:\SMSbackup\SiteServer\SMSServer\inboxes\auth\statesys.box\incoming, FAILED, Win32 Error = 145
Deleting E:\SMSBackup\SiteServer\SMSServer\inboxes\auth\ddm.box, FAILED, Win32 Error = 145
Deleting E:\SCCMBackup\Backup, FAILED, Win32 Error = 145
Failed to delete the contents of the backup folder. Error Code = 0x0 SMS_SITE_BACKUP
Error: Deleting the existing files in the backup location failed... SMS_SITE_BACKUP
SMS site backup failed. Please see previous errors. SMS_SITE_BACKUP
SMS site backup service is stopping. SMS_SITE_BACKUP
These errors can occur if the Volume Shadow Copy Service (VSS) provider is in use by another process. Configuration Manager Backup expects to have exclusive access to these resources when performing a backup.

To prevent these errors, configure Configuration Manager Backup to start at a time outside the window for other backup jobs on the server. The schedule for this can be found in the Configuration Manager Console under Site Management -> Site Code -> Site Settings -> Site Maintenance -> Tasks -> Backup ConfigMgr Site Server.

For all the details and the latest version of this document please see the following new Knowledge Base article:

KB2387913 - System Center Configuration Manager 2007 backups fail with Win32 Error = 145

System Center Configuration Manager 2007 Toolkit V2

The Configuration Manager 2007 Toolkit V2 contains 11 downloadable tools to help you manage and troubleshoot Configuration Manager 2007.

More info and download link: http://www.microsoft.com/downloads/en/details.aspx?FamilyID=5A47B972-95D2-46B1-AB14-5D0CBCE54EB8

Rebuilding and reinstalling the WMI Repository

If you experience behavior when using WMI, such as application errors or scripts that used to work are no longer working, you may have a corrupted WMI repository. To fix a corrupted WMI repository, use these steps:

Windows XP and Windows Vista

Click Start -> Run and type CMD.EXE
Note: In Windows Vista, you need to open an elevated Command Prompt window. To do so, click Start, click All Programs, click Accessories, right-click Command Prompt, and then click Run as administrator.

Type this command and press Enter:

net stop winmgmt

Using Windows Explorer, rename the folder %windir%\System32\Wbem\Repository. (For example, %windir%\System32\Wbem\Repository_bad). %windir% represents the path to the Windows directory, which is typically C:\Windows.

Switch to Command Prompt window, and type the following and press ENTER after each line:
net start winmgmt
EXIT

For Windows XP Service Pack 2 and Service Pack 3

Click Start, Run and type the following command:
rundll32 wbemupgd, UpgradeRepository

This command is used to detect and repair a corrupted WMI Repository. The results are stored in the setup.log (%windir%\system32\wbem\logs\setup.log) file.

For Windows Vista

Open an elevated Command Prompt window. To do so, click Start, click All Programs, click Accessories, right-click Command Prompt, and then click Run as administrator.
Type the following command:

winmgmt /salvagerepository

The above command Performs a consistency check on the WMI repository, and if an inconsistency is detected, rebuilds the repository. The content of the inconsistent repository is merged into the rebuilt repository, if it can be read.

For Windows Server 2003

Use the following command to detect and repair a corrupted WMI Repository:

rundll32 wbemupgd, RepairWMISetup

Re-registering the WMI components

The .DLL and .EXE files used by WMI are located in %windir%\system32\wbem. You might need to re-register all the .DLL and .EXE files in this directory. If you are running a 64-bit system you might also need to check for .DLLs and .EXE files in %windir%\sysWOW64\wbem.

To re-register the WMI components, run the following commands at the command prompt:
  • CD %windir%\system32\wbem
  • for /f %s in ('dir /b /s *.dll') do regsvr32 /s %s
  • for /f %s in ('dir /b *.mof') do mofcomp %s 
Registering WMI Service itself

Open the command console, type "net stop winmgmt". When you get the warning that other services need to be stopped type 'Y' and continue.

Open 'My Computer' and then go to the folder '%SystemRoot%\System32\WBEM\Repository' and delete that folder.

Reboot your system.

After you login, open the command console, and type the following commands in order: 

winmgmt /clearadap
winmgmt /kill
winmgmt /unregserver
winmgmt /regserver
winmgmt /resyncperf
Note: If this doesn't fix the problem, you need to try reinstalling Comprehensive rebuild method.

Comprehensive rebuild method

Important note: If you've installed a Service Pack, you need to insert your Windows XP CD with Service Pack integration (called as the Slipstreamed Windows XP CD). If you don't have one, you may point to the %Windir%\ServicePackFiles\i386 folder for a recent version of the system files required during WMI repair. Or you may create a slipstreamed Windows XP CD and insert it when prompted.


Click Start, Run and type the following command, and press ENTER:

rundll32.exe setupapi,InstallHinfSection WBEM 132 %windir%\inf\wbemoc.inf

Insert your Windows XP CD into the drive when prompted. Repair process should take few minutes to complete. Then restart Windows for the changes to take effect.

Note that none of the above two methods restore the missing files related to Windows Management Instrumentation (WMI). So, below is a comprehensive repair procedure that restores all the missing WMI modules. In case of missing WMI modules, you may use the following method.

Repair WMI using BAT File:

Most of the WMI problems can be solved by rebuilding the WMI Repository, re-registering the WMI components. To automate this, you could create a BAT file. Copy the following lines to a text file and save it with .BAT extension and run it to fix common WMI issues.
net stop winmgmt /y
%SYSTEMDRIVE%
CD %windir%\system32\wbem
rd /S /Q repository
net start winmgmt
for /f %%s in ('dir /b /s *.dll') do regsvr32 /s %%s
for /f %%s in ('dir /b *.mof') do mofcomp %%s